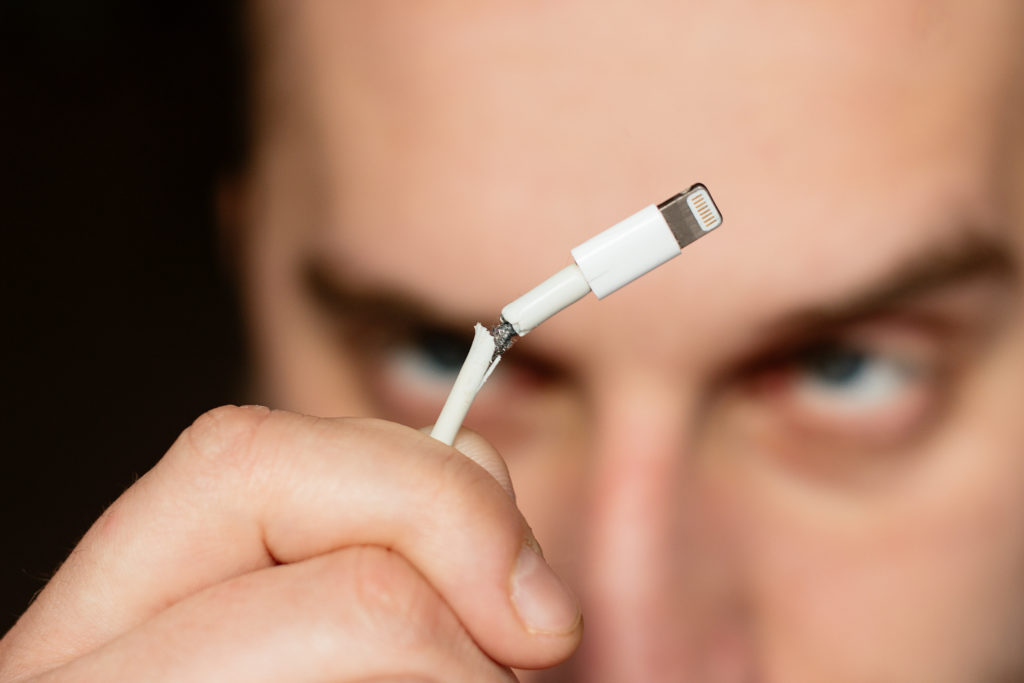
How to Fix Frayed Phone Charger

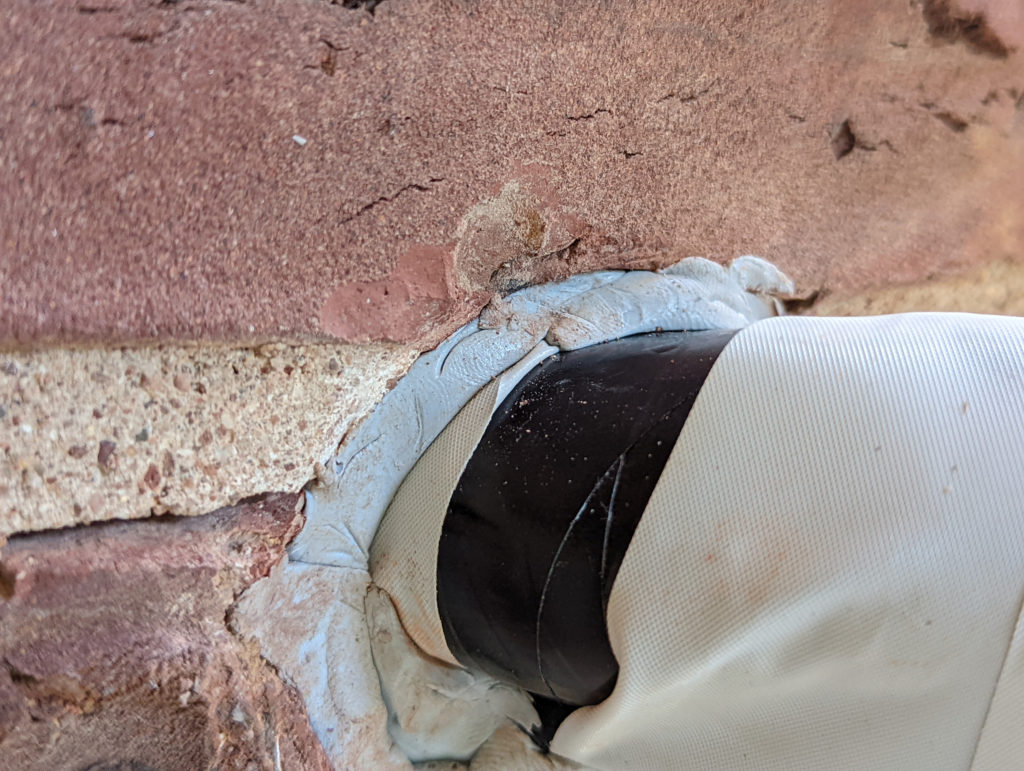
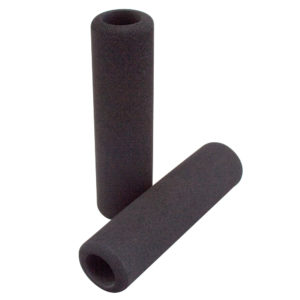
Your phone charger cable is always the first thing to go after you just spent hundreds on a new phone a few months before. It’s a tragic story and we all experience it. If your charger is still working, here’s an inexpensive way to protect your usb charger cable or power cord from further damage.

Continue reading

Caulk Alternatives: How to Easily Fill Gaps in Appliances and Walls

Small holes in appliances and walls are common in many households. First, you might try to even out the surface with caulk. Whether you are a renter or a homeowner, caulk can be a messy job that requires the help of a professional to create a seamless finish. E/Fusing 900 Putty is a silicone putty that seals a variety of holes and cracks without the hassle. Several putty colors are available including black, gray, and white to suit any of your aesthetic needs. 

In this article, we will discuss the benefits of waterproof silicone putty as a caulk alternative.

The Benefits of Silicone Putty 

Waterproof 

Customers have relied on E/Fusing 900 silicone putty to plug holes in showers, sinks, and water-exposed areas. The waterproof material is resilient against leakage and maintains a strong hold in a variety of temperature conditions. Lastly, if you need to plug a hole in a pinch, a waterproof silicone putty is an ideal solution. 

Moldable to Fit Nearly Any Shape or Size

Silicone putty is a user-friendly caulk alternative since it’s malleable to fit any hole shape, without the need for extra tools or drying time. The putty can be warmed up in your hands and worked into any crevice to provide a lasting sealant solution. 

Seals Extremely Well

Many people worry about the durability of waterproof silicone putty; however, it has a time-tested sealing strength. The material does not sag or droop, allowing it to virtually seal any hole without moving or altering its shape. 

Not Messy or Gooey 

Using traditional caulk is a messy process since it’s wet, gooey and takes time to cure. This can ward off people that aren’t familiar with small DIY renovation projects. Silicone putty can be used right out of the package without any messy hands or risk of ruining other areas of your house. 

Comes in a Variety of Colors

E/Fusing 900 silicone putty comes in three basic colors including black, white and gray. We recommend you color match the putty according to the surface area you need to fill. Traditional caulk is found in a white color, which can require extra steps like painting and covering after the caulk dries. Moldable silicone putty eliminates all the added steps, while still giving you the versatility of use. 

What Makes E/Fusing 900 Silicone Putty Different? 

  • Does not harden or crack like alternative patches
  • Creates an impenetrable waterproof barrier
  • Little to no mess during application
  • Non-hardening and stays flexible, expanding and contracting indoors. (outdoors it may cure if in direct sunlight)

Fill Gaps and Holes in Appliances, Walls, Showers and More With E/Fusing 900 Putty

Every homeowner deserves a simple solution to fill holes, cracks and incongruencies in their home. Whether you need to patch up an area in your bathroom, kitchen or bedroom, E/Fusing 900 Putty is able to get the job done. Start by exploring our variety of three colors today and get started on your next hassle-free home improvement project!

Wheelbarrow Handle Replacement

Wheel barrow Grip

Is It Time to Upgrade Your Grip?

Why replace your wheelbarrow when you can re-grip the handle? Using Tommy Tape Grip Wrap, wheelbarrow handle replacement is easy. Undoubtedly, your wheel barrow handle gets worn down and needs protection. 

Here’s how to know if purchasing grip wrap will help:

Is your handle…

  • Chipping?
  • Cracked?
  • Moldy?
  • Worn down?
  • Stiff?
  • Slippery?

Then adding a supportive grip to your wheelbarrow is worth looking into. It can prevent wood from contacting directly with your hands and leaving splinters and blisters. When there is a crack down the handle the grip can wrap up the handle and hold it together. Mold? Now you can, thoroughly clean the handle then add the grip to provide a protective barrier to the handle and your hands. Of course also making a cushy and comfortable handle for your hands .

Benefits of Regripping

✅Preventing calluses: Working hard with your hands can cause a buildup of rough calluses and dry out your hands. Using a proper grip can protect your hands. 

✅Protect the handle: Handles can grow mold and lock in moisture, making the handle hard to clean. Silicone grip is easy to clean and will wash right off, leaving a nice handle to use. 

✅Weatherproof: Adding silicone grip can protect the handle from the elements and ensure it is ready for use. 

✅Preventing blisters: After repeatedly gripping a hard surface, your hands can get blisters from friction.

Here is how to regrip your wheelbarrow handle:

  1. Clean the handle: Using rubbing alcohol, clean off the handle to make sure there is no dirt or dust. 
  2. Take the grip wrap out: Once the handle is cleaned thoroughly, open the grip wrap, peel back some of the grip and separate it from the plastic liner. Get at least 5 inches of material exposed and ready to use.
  3. Begin wrapping around one end of the handle: Make sure to do one complete wrap then begin overlapping and wrapping. Pull on the grip and wrap it as tightly as possible. 
  4. Secure the end: Now, when the majority of the handle is wrapped, make one complete rotation and loosely place the wrap down on top of itself to ensure a seal. 

Having a comfortable handle for your wheelbarrow is essential for the fall cleanup that is about to begin. We have other articles on gripping other essential lawn care items, Lawn mower Handle, Garden Hand Tools and, Rake Grip. Get your roll of grip wrap, offered in 5 or 10 feet in black, or 5 feet in white, red, green, pink, blue, and orange.

Back Scrub Brush grip

Want to make your elderly relatives lives easier. Get Tommy Tape Grip Wrap; it can go on their canes, shower chairs, wheel chairs, walkers, Back Scrub Brushes and more. 

The Benefits of Exfoliating Body Brush Grip

-No Bending Over: A body brush is for the shower and due to the wet nature it is slippery, especially combined with soap. Everyone drops their loofa from time to time but it is hard to bend over in the shower to pick it up. But with Tommy Tape Grip Wrap there are ribs and a silicone tacky feel for a better clasp on the brush. No more bending over!

-More Control: Older people tend to have issues such as arthritis, carpal tunnel, tendonitis and other hand ailments to prevent full function of the Back Scrub Brush. But with the grip they will have better control and more function and have the ability to fully clean themselves. 

-Set It and Forget It: Tommy Tape has longevity and there’s no need to replace it constantly. Due to the silicone. Grime and soap scum will wipe off and clean very easily. 

Why Tommy Tape Grip Wrap?

No Mold: aftermarket grips that are made of foam may retain moisture, promoting mold growth. Tommy Tape Grip Wrap is a silicone based grip wrap that repels water and will not get caked in soap scum and mold. 

Easy to apply: Due to the silicone material, the wrap self-fuses and there are no adhesive or extra steps. Just wrap the wrap around the handle and to take it off use scissors  or a multi tool  to cut it off. 

Will Not Wear Out: Silicone tape is very durable and will not break down in extreme conditions like other materials. 

How to Grip a Back Scrub Brush:

1.

Clean the Area: Use rubbing alcohol to clean the area to ensure there is no soap scum on the back scrub brush handle. If there is any remaining soap scum it will not allow the wrap to stay on the brush as well.

2.

Take the new grip out. Prepare to wrap it around the racket. Peel back about 5 inches worth of the plastic backing on the wrap. The wrap is self-fusing, so there’s no adhesive mess. However be cautious to not have the tape get tangled as it is being wrapped because it will fuse and have a hard time coming undone. 

3.

Begin Wrapping at Bottom of Handle: Take the unwrapped part of the grip and wrap it completely around the bottom of the handle. Then begin spinning the body brush while holding the grip firm and overlapping the grip as you go. Stretch the tape as wrapping to ensure a tight wrap. 

4.

Leave a flagged End: Once done wrapping completely around the top, leave the end not stretched but limp and folded over the grip and squeeze to ensure tape fuses.

Pool Light Repair: Fix a Pool Light Leak

If your pool light fixture is leaking water, you may be postponing your summer plans.  Pool lights commonly get cracks around the connector ports which can be the source of losing water level. While you may consider getting a new pool light, there are more affordable solutions available to you. 

Before investing in a replacement, consider using E/Fusing 900 Silicone Putty to repair the crack in no time. Users will save money and receive a reliable, quick resolve to their pool leak. In this article, we’re going to break down everything you need to know about how to fix your pool light with putty. 

The Benefits of E/Fusing 900 Silicone Putty 

  • Easily moldable: The material is highly malleable so you can bend, mold, and shape it to your desired surface. The pool putty is resilient and will maintain its form even in harsh conditions. 
  • Safe for electrical use and strong insulation: The putty is entirely safe for electrical use making it a great option for pool light replacement. Contrary to other pool types, silicone putty provides superior insulation in the water. The flexible material can fit smoothly into small cracks and crevices. 
  • Fixes leaks: If there is leaking, consider mending the area with putty before getting a new light. E/Fusing 900 Silicone Putty is strong enough to fix leaks for good and restore peace of mind in seconds. 
  • Cost Effective: A new light fixture costs anywhere from $100-$300. However our putty costs less than $20.

The Unique Feature of E/Fusing 900 Silicone Putty For Pool Light Replacement 

  • Easily Removable: If you decide to remove your pool putty it will come off easily without harming or irritating the pool surface. 
  • Waterproof: E/Fusing 900 Silicone Putty is entirely water resistant which allows the material to maintain integrity over long periods of time. The durable design won’t disintegrate or cause problems until you are ready for removal. 
  • Easy to shape: Simply massage the putty into your hands to loosen the material and shape it to your desired form. Pool putty is able to seal small cracks and crevices that tape alone can’t reach.
  • Does not absorb water and guarantees tight insulation: Putty will not absorb water so no water can get through to the other side of your plug. Firmly press the putty into the leak point to ensure strong, tight insulation that doesn’t budge. 
  • Does not harden or crack: Putty will never harden and will always stay pliable, but will not harden or crack over time. Pool putty is a great option for repairing the light because of its longevity both in and out of water for long periods. 

How to Use Putty for a Water Leak in Your Pool Light Fixture

  1. Massage E/Fusing 900 Silicone Putty in your hands to soften slightly prior to use. 
  2. Remove the outer face of the pool light to reveal the inner wire. 
  3. Locate the back conduit that connects the pool light wire to the inside concrete of the pool. 
  4. Slowly pack the putty into the crack around the wire, or wherever your potential leak may be located. Be sure to pack putty all the way around wire to seal the entire area. Add more layers if needed.
  5. Move the face of the pool light back into position and you’re all set!

Are you considering a pool light replacement? Here at Tommy Tape, we offer a superior pool putty solution for any common light leak. Check out the E/ Fusing 900 Putty today here, or reach out to us if you have any questions. 

Regrip a Tennis Racket

How Do I Know When I Should Regrip My Tennis Racket?

Depending on the type of player you are, you might regrip at different times. 

  • Recreational: These are the players who play once a week or once a month for fun. Changing the grip 1-3 times a season should work for someone who plays less than 4 hours a week. 
  • Membership Player: Club members play a couple hours a week, they will wear out the grip faster, so changing it more frequently is beneficial to maintaining a good grip on the racket. Club members should be changing the grip once a week, depending on the player’s needs of course. 
  • Semi-Pro/Pro: With the amount of wear and tear the handle sees at this level, the grip should be changed before every match and even during. Having a new tacky feel to the grip every game can help prevent players from getting blisters from having to constantly change their grip. 

If you’re a beginner and need to know when to change the grip, try using this checklist:

  • Has your grip lost its tacky feel?
  • Any tearing?
  • Is there a black residue being left on your hands? 

Any of these are a yes? Then it may be time to make a change. Regripping is an affordable way to make your racket feel like new. Replacing the grip can give you a comfortable hold on the handle once again. It is super easy and only takes 3-5 minutes. 

The Benefits of Regripping

  • Cost Effective: Buying a new tennis racket can cost anywhere from $20-$300 and can get expensive fast. Grip loses its tacky feel very quickly depending on use, replacing the grip might be necessary before every game. Regripping the handle with Tommy Tape Grip Wrap costs just $9.99, which is a small price to bring your favorite sports equipment back to life.  
  • Custom Grip: By wrapping the grip, you can make it how you like it. There is a lot of variety in how you can wrap the tape. You could wrap it to be thicker or thinner, and the possibilities are endless. Be creative! 
  • Better Hold: Never worry about the racket slipping out of your hands during a game. You can fully focus on your swing and technique rather than keeping the racket in your hand. 

A Step-by-Step Guide on How to Regrip Your Tennis Racket:

1:

Take off the old grip. If the grip is a wrap, it will need to be unwrapped and taken off. An easier way of getting it off, is using an X-Acto knife or scissors can help take it off. Over grips can be also sleeves but those can slide right off. Is the tennis racquet new? There’s no need to do anything.

2: 

Clean off the handle. Check the bevels for any dirt or leftover adhesive, and clean the handle thoroughly. Get rid of all the bumps, they will be felt through the grip. Make sure to get all the nooks and crannies flattened out. 

3:

Take the new grip out. Prepare to wrap it around the racket. Peel back about 5 inches of the plastic backing on the wrap. The wrap is self-fusing, so there’s no adhesive mess. However, be careful not to let the tape get tangled as you are wrapping, because it will stick together and is hard to separate again. 

4:

Begin wrapping at the butt. Start with the unwrapped part of the grip and wrap completely around the butt of the handle. Then begin spinning the racket while holding the grip firmly and overlapping the grip as you go. With a tighter wrap stretch the grip as you wrap, but if you like it looser you do not need to stretch it as much. 

5:

Seal off the top. Once the grip is wrapped all the way up the handle, make any changes to the top, like cutting off excess or cutting away lumpy sections. Finally, if you have some silicone tape around, seal off the top by wrapping it around the tape to ensure it will not unravel.

Tommy Tape Grip Wrap

Tommy Tape is different from other different tennis grip tapes because there is no adhesive mess, which gives you the advantage compared to other players. Tommy Tape Grip Wrap has a bumpy, tacky feel that can improve every player’s game. This new grip you will be feeling the benefits once you step on the court and take your first swing. Regrip your racket today with our Tommy Tape Grip Wrap and reap all the benefits and beat all your friends. 

Regrip my Pickleball Paddle

How Do I know When To Regrip My Pickleball Paddle

Depending on the condition of the paddle then that determines if it needs to be regripped or not. 

  • Rips: If there are rips or holes in the grip it may be time to replace it.
  • Old: Depending on how often the paddle is used, 2-3 months is a general rule for how often grip should be replaced. But the more someone plays the more frequent the grip needs to be replaced. 
  • Dirty: Overtime there can be dirt build-up and the grip can lose its tacky feel. Replacing the grip frequently can keep the paddle’s grip feeling new. 
  • Dark Hands: From over use the grip can start to wear and leave a black residue on your hands.

If your grip has any of these issues it is time to look at replacing the grip. Take a look at Tommy Tape Grip Wrap as a replacement grip. Pickleball grip is extremely important to play the game.

Difference in Tommy Tape Versus Others

Tommy Tape Grip Wrap Competitor’s Product
✅ Non-Adhesive: Grip wrap is self-fusing and does not require adhesive to stay wrapped around the handle of the paddle. 🗙 Requires Adhesive: Competitors do not self-fuse and require adhesive to stay attached the the paddle. 
✅ Easily Modifiable: Grip wrap can be cut and wrapped in anyway that is comfortable.  🗙 Cannot Modify: Competitors have a guideline and the racket can only be wrapped a certain way and it is hard to cut and customize. 
✅ Ridges to Improve Grip: Ridges and divots help keep control over the paddle for a better swing 🗙 Smooth: A smoother surface loses the grip easier. If the tacky feeling goes then there is no grip. But if the tacky feeling leaves on the tommy tape the ridges still provide grip. 

Step by Step on How to Grip a Pickleball Paddle:

1.

Remove Old Grip: Peel back the old grip and strip it all off. If it is having a hard time coming up then use an X-Acto knife or multitool to strip away at the old material.

2.

Remove adhesive or remaining substance: Examine the handle for any glue or pieces of material left behind. Clean off the handle thoroughly using adhesive remover or whatever is on hand. Be sure to completely clean the handle, whatever is left behind will be felt through the grip. 

3.

Take the new grip out: Prepare to wrap it around the racket. Peel back about 5 inches worth of the plastic backing on the wrap. The wrap is self-fusing, so there’s no adhesive mess. However be cautious to not have the tape get tangled as it is being wrapped because it will fuse and have a hard time coming undone.

4.

Begin Wrapping at the End Cap: Take the unwrapped part of the grip and wrap it completely around the end cap. Then begin spinning the paddle and wrapping the tape and overlapping it as it goes up the handle. Be sure to hold a firm clutch on the excess tape and be sure not to tangle the tape as it is being wrapped because it will get stuck together and fuse. 

5.

Clean up top of racket: Once the pickleball grips is wrapped all the way up the handle, changes might need to be made. Whether to cut at the top and make it even or to cut away at any lumps or bumps. Finally if you have silicone tape, it can be wrapped around the top to seal it off to make sure it will not be unraveled. 

Dumbbell Grip for Weight Lifting

If you have lifted weights before, then you have noticed that dumbbells and barbells get slippery easily, can cause blisters and calluses, and can leave a distinct smell on your hands. Tommy Tape Grip Wrap prevents these things from happening and gives you extra protection. Grip wrap is the perfect dumbbell grip. 

What is the advantage of using Grip Wrap on weights?

  • Lift Heavier: Having a better hold on the weight can lead to being able to lift heavier weights rather than focusing on your grip.
  • Non-Slip Grip: Sweating is obviously the goal, but it can pose a challenge while weight lifting. The weight can start to slip, and rather than focusing on form and mechanics, the focus turns to trying to make sure you don’t drop the weight. This is where the grip wrap comes in and can help create a better hold on the weight. 
  • Prevents Blisters: Weight lifting can be hard on the hands, and over time the repetition of lifting the metal bar can create blisters and calluses. Using the grip wrap will create a tacky surface that provides the right amount of cushioning. 
  • Tacky Surface: Rather than gripping bare metal that slips easy and causes blisters, grip wrap has a tacky surface that works with your hands rather than against them. 
  • Bring Old Weights Back to Life: Older weights can get chipped, rusty and worn over time. Rather than wasting money on buying new ones, putting grip wrap over them can save your old weights. 
  • No Adhesive Mess: Grip tape is a commonly used tool for gym rats who lift. But once the tape gets worn down and they remove it, it leaves behind adhesive that can be tricky to remove. Tommy Tape Grip Wrap is a silicone-based material that self-fuses rather than needing adhesive. It can be easily cut off with an X-Acto knife or scissors and will never leave anything behind. 


Types of weights to use the grip wrap on:

  • Dumbbells: This grip wrap works great on dumbbell grips and gives you complete control over the weight. 
  • Pull-Up Bar: Foam is usually used as a pull-up bar grip, but that can wear and tear easily, whereas our grip stays fused to the bar and does not flake off easily. 
  • Barbell: Barbell grips can be hard to deal with, but the tape is a great substitute and can help increase weight lifting technique for deadlifting, bent over rows, and many more. 

Benefits of Dumbbell Grip Wrap Versus Dumbbell Grips


Grip Wrap Dumbbell Grip
✅ Stays in place: Keeps a firm hold on the bar it is wrapped around. 🗙 Pad slips off: The pad is easily slipped on but can just as easily slip off during the workout.
✅ Thinner and flexible: Adds cushion but does not make the bar thicker. 🗙 Too thick: Cannot feel the bar that the grip is attached to. 
Firm: Does not affect the firmness of the bar. 🗙 Too soft: When lifting having a firm surface is important, it can improve strength. 
Customizable: The wrap can form to the shape or length of the bar.  🗙 Not customizable: Grip stays the same shape and cannot be adjusted.
@tommytape Renew your weights rather than buying new ones! #diy #workout #weights #diyproject #fun #fyp #foryoupage #viral #xyzbca #like #follow #comment ♬ Aesthetic – Tollan Kim


How to apply dumbbell grip tape to weights:

1.

Clean off the area where the grip will be placed. Spraying it down with some cleaner and wiping it with a paper towel should do the trick. If there are any bumps, they will be felt through the grip, so make sure to get all the nooks and crannies flattened out. 

2.

Take off the plastic backing on the grip tape. Prepare to wrap it around the weight or bar. Peel back about 5 inches of the plastic backing on the wrap. The wrap is self-fusing, so there’s no adhesive mess. However, be careful not to let the tape get tangled as it is being wrapped, because it will stick together and is hard to separate. 

3.

Begin wrapping from one end to the other. Start with one complete overlap rotation, then start overlapping by covering the flat part of the wrap. Continue around the weight until the desired area is covered, finish off with one final overlap rotation then cut it. 

4.

Cut off undesired pieces or clean up the top. Sometimes the wrap at the top can look uneven. Use an X-Acto knife or scissors to cut the wrap and make it even. 


With this new grip it will go on easy but come off even easier. Unraveling the grip and leaving behind adhesive and a sticky mess is annoying. Start by, cutting the grip off with scissors or an X-Acto knife and have it done in seconds. Tommy Tape has the best dumbbell grip.